


Implementing Role-Based Security in Power Apps with SharePoint
SharePoint lists are perfectly capable of driving a role-based security model in Power Apps - provided you separate the security data from the business data and lock down the list itself.
Résumer cet article avec une IA
Le lien ouvre l'assistant choisi avec une question pré-remplie pointant vers cette page.
Using SharePoint as a data source in Power Apps provides flexibility and simplicity for managing user roles. In this guide, we'll create a role-based security system where the app dynamically adapts the visible components based on the logged-in user's role. We'll also secure SharePoint to restrict direct UI access.
Objective
- Dynamically control which app components are visible or enabled based on the user's role
- Restrict direct access to SharePoint while maintaining access for Power Apps
Step 1: Create Role-Based SharePoint Lists
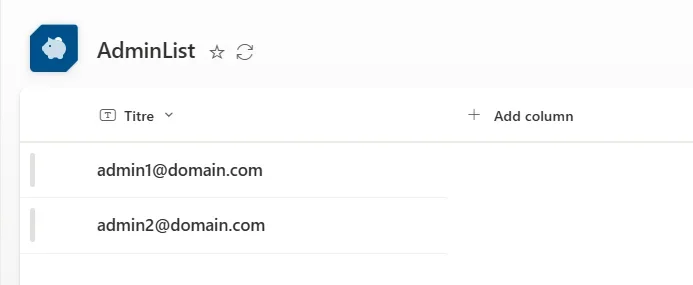
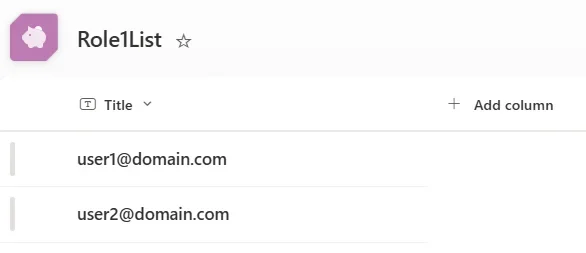
To manage roles, create a separate SharePoint list for each role. These lists will store the email addresses of users assigned to that role.
Example SharePoint Lists:
AdminList: for admin usersRole1List,Role2List,Role3List: for specific user roles
List Structure: each list will have a single column, Title (the default column in SharePoint), to store user email addresses.
Step 2: Initialize Role-Based Variables in Power Apps
Use the OnStart property of the app to check whether the logged-in user's email exists in the respective SharePoint list. This determines their role.
Set(
    isUserAdmin,
    !IsBlank(LookUp(AdminList, Title = User().Email))
);
Set(
    isUserRole1,
    !IsBlank(LookUp(Role1List, Title = User().Email))
);
What This Does:
LookUpchecks if the logged-in user's email (User().Email) exists in the respective SharePoint listSetassigns the result to a variable (trueif found,falseotherwise)
Step 3: Use Variables to Adapt App Components
Once the role-based variables are initialized, use them to control the visibility or accessibility of components.
- Hide a button for non-admins:
Visible: isUserAdmin
- Enable a field only for Role1 users:
DisplayMode: If(isUserRole1, DisplayMode.Edit, DisplayMode.Disabled)
- Show a validation button for Role2 and Role3 users:
Visible: isUserRole2 || isUserRole3
These variables ensure that each user sees only the components relevant to their role.
Step 4: Restrict Direct Access to SharePoint
By default, users can access SharePoint lists via the browser, potentially exposing data. To prevent this, restrict SharePoint access while allowing Power Apps to interact with the data.
Create a Custom Permission Level:
- Go to Site Settings → Site Permissions → Permission Levels → Add a Permission Level
- Name it, for example
Restricted PowerApps Access - Remove View Application Pages (prevents access to site pages and lists)
- Remove Open Items (blocks direct data view)
- Keep Use Remote Interfaces enabled to allow Power Apps to interact with SharePoint
Assign this permission level to users or groups who should access SharePoint data only through Power Apps.
Step 5: Test Your App and Permissions
Test Role-Based Visibility: log in as an admin and verify that admin-only components are visible. Log in as a Role1 user and confirm that only Role1-specific components appear.
Test SharePoint Restrictions: attempt to access the SharePoint list directly as a restricted user — you should see an access denied message. Verify that Power Apps can still read and write data.
Conclusion
This approach combines the flexibility of Power Apps with SharePoint's robust data management capabilities. By dynamically adapting the app's interface and securing SharePoint, you ensure a seamless and secure user experience.
Sources
Official references, accessed 23 August 2026.